The system of coordinates
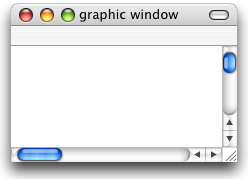
A graphic window defines a PDF page, the white rectangle that you see if you resize the window. In the PDF page the graphic window defines a system of (x,y) coordinates which assume real values and whose scale is 1 pixel (1/72 inch). Positive directions point rightwards and upwards. When you click in a graphic window, by default its message bar displays the location of the pointer in that system of coordinates.
The horizontal and vertical sizes of the PDF page are the pagewidth and pageheight properties of the graphic window. If the default values do not suit your needs change the values of those properties. You can set them, either in pixels (the default unit) or in centimeters or in inches -- however, when you read the pagewidth and pageheight properties you always get them in pixels. To specify the units use the as preposition as in the example below.
set w to make new graphic window
-- define a landscape A5 format
set pagewidth of w to 20.9903 as centimeters
set pageheight of w to 14.8519 as centimeters
Often when you change the pagewidth or pageheight of the PDF page you want to adapt its window's width and height accordingly. Those quantities are the graphic window's width and height properties (still in pixels). The scrollbars and the window's title bar imply that you set the following offsets between the PDF page's sizes and the window's size:
set width of w to pagewidth of w + 16
set height of w to pageheight of w + 16 + 22
When you set the graphic window into edit mode (select Edit ▸ Edit mode), pressing the ⌥ key turns the cursor into a hand and you can move the graphic as a whole. When you do so you actually move the origin of the coordinates of the PDF page. For instance if you move the graphic upwards and rightwards you will actually push the origin of the coordinates into the PDF page.
To change the origin of the coordinates of the PDF page (or to reset them to the default value {0, 0}) use the frame property. The frame property is a list {x0, y0, dx, dy} (in pixels): {x0, y0} are the coordinates of the bottom left corner of the PDF page, and {dx, dy} are really pagewidth and pageheight.
Graphic options for the graphic window
- An explicit call to draw is required to refresh the graphic window because Smile does not systematically refresh the display. This design feature is intended so that you can manipulate graphs with large amounts of data without wasting CPU time with useless updates.
-
To provide a colored background to the graphic window instead of the default while background set the fill color property of the graphic window to any rgba color. A rgba color is a list of three or four real numbers in the range [0..1]: {r, g, b, a}, the red, green and blue components and the opacity (0.0: transparent, 1.0: opaque), optional.
-
The graphic window has two properties that can hold PDF data in order to display custom graphics: front pdf and back pdf. When the graphic window refreshes its display it draws, in that order, the background fill color, the back pdf, the data visualization objects (the graphic views), and finally the front pdf.
To have the graphic window display an existing PDF document, load its contents into the back pdf or front pdf property, then apply close to terminate editing the PDF. Finally call draw to refresh the display.
set thepdf to read (choose file) -- prompt for a file
set w to make new graphic window
set back pdf of w to thepdf
close back pdf of w
draw w
If a document has several pages, Smile displays by default only the first page.
-
Instead of copying a PDF document, you can make a PDF by script (once for all or dynamically) with Smile's PDF graphic library, Graphic Library. To make a PDF by script into the back pdf, do not manipulate directly the back pdf property. Instead, use the macro-commands BeginFigure(w) ... EndFigure(), providing in w a reference to the graphic window. Between these commands, insert the graphic commands that will define the drawing. The example below draws a light blue frame.
set w to make new graphic window
BeginFigure(w)
SetPenColor({0.8, 0.8, 1, 1})
SetPenWidth(10)
RectPath(frame of w)
DrawPath(2) -- 2 = stroke only
EndFigure()
draw w
To make a PDF by script into the front pdf, encapsulate the graphic commands between BeginFrontFigure(w) and EndFrontFigure().
The example below draws a semi-transparent message over a new graphic window.
set w to make new graphic window
QuickCurve({}, randomarray 10, w)
BeginFrontFigure(w)
SetTextFont("Times New Roman")
SetTextSize(72)
SetFillColor({0, 0, 0, 0.3})
SetPenColor({0, 0, 0, 0.3})
TextMoveTo({100, 200})
DrawString("Classified")
EndFrontFigure()
(Here we use QuickCurve, a command in the QuickPlotLib library that we present below in this document.)
-
When you create several graphs (graphic views) in a graphic window, the first graph will be centered in the PDF page, and subsequent graphs will be drawn outside the PDF page, one below the other (you will have to scroll down the graphic window to view them).
You can change this behavior and have the graphic window place successive graphs on a lattice in the PDF page. Use the grid property, a list {i, j} of two integers (default: {1, 1}). The grid property specifies the default setup in the PDF page for i.j successive graphic views as i columns, j rows. {3, 2} means that if you create 6 graphics they will arrange automatically into two rows of three.
set w to make new graphic window with properties {grid: {2, 1}}
-
It is the graphic window's responsibility to draw the names of the graphic views that it contains. A graphic view's name will print centered with respect to the graph. You can adjust its vertical position by changing the value of the title offset property (11.0 by default). title offset specifies how many pixels above the top axis the graphic view's name will print. You can change the font of the view's name by setting the text font and text size properties of the graphic window.
-
When you make a new graphic window, and then when you make new graphic views for that graphic window, each of those objects use default values for their properties. Those default values are really stored in a file, whose name is known to the graphic window as its template property. You may want to set the template property to the name of another template file - for instance you are working in colors and you want to issue a PDF in black and white. How to use the template property and the templates is explained in Using custom default settings.
-
To display the window in full screen, you can set its has title bar and toolbar visible properties to false to hide the title bar and the toolbar of the window, set its autohide scroll bars property to true to hide its scrollbars, and set its pageheight and pagewidth properties to the screen's dimensions (that you can obtain with get my screen bounds). Before that, you may want to hide the application's menu bar with set my menu bar visible to false (the menu bar is still accessible by moving the mouse on the top of the screen).
The example below makes an empty graphic window displayed in full screen.
set my menu bar visible to false
set {x, y, xx, yy} to get my screen bounds
set w to make new graphic window with properties {toolbar visible:false, has title bar:false, autohide scroll bars:true, pagewidth:xx, pageheight:yy}
-- to get back the menu bar, run the following line:
-- set my menu bar visible to true
Other options for the graphic window
-
By default the graphic windows are created with scrollbars that allow you to scroll out of the window's frame. You can set the scrollbars' length with the margins property.
-
If you make many graphic windows for testing purposes you may want to use the never save property. Setting never save to true will suppress the Save changes before closing caution alert when you close the window: use never save only if you are sure.
set w to make new graphic window with properties {never save: true}
-
You can zoom in and out a graphic window by script using its scale property.
-
The movie file property of graphic windows is what you use to make successive displays of the graphic window into a movie (a QuickTime video). You can find more information about movie file in Making a QuickTime movie.
-
any graphic window has a eye position property, which changes when you drag the mouse in the graphic window, as if you were using a trackball. You can use the eye position property to simulate a trackball and have a 3D drawing in the graphic window adapt according to the user's mouse moves.
|